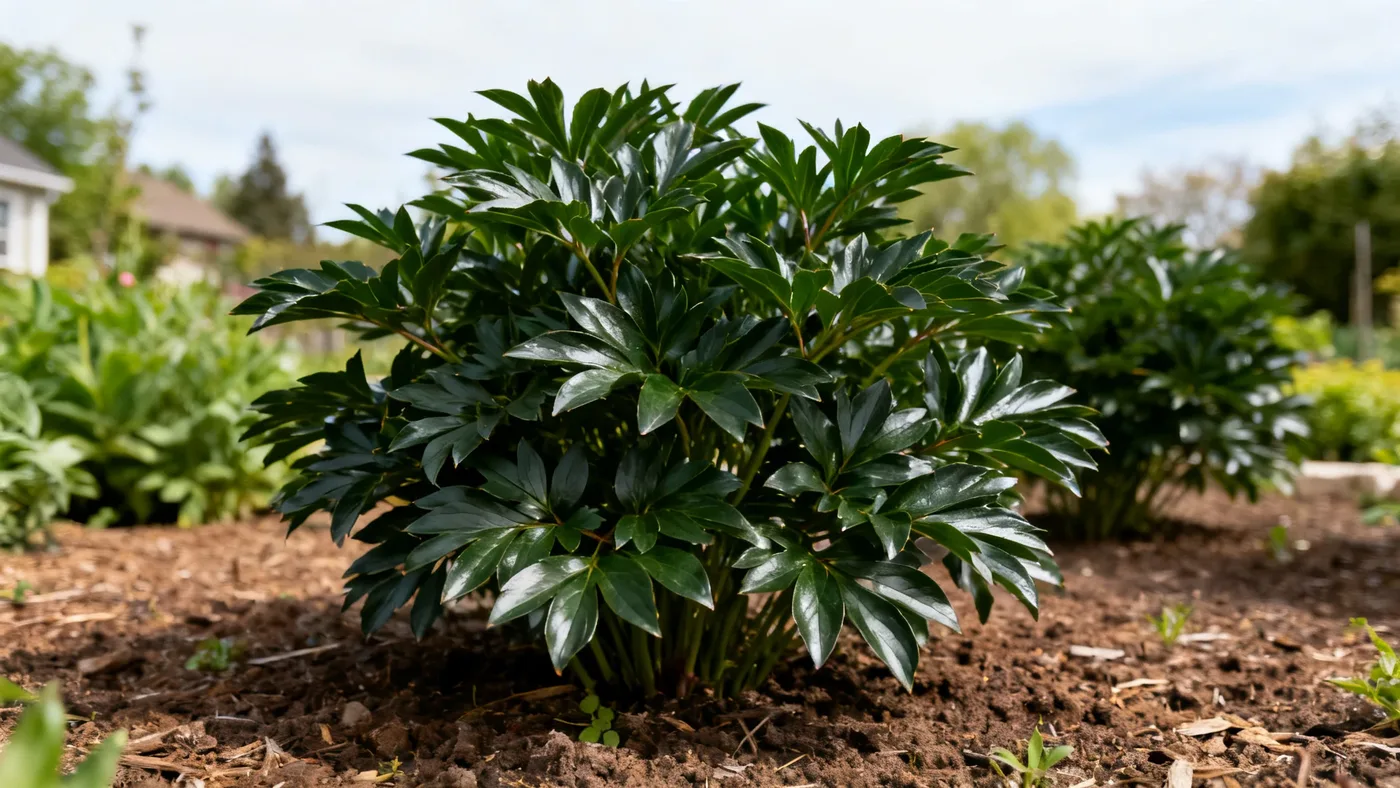
Best Soil, Drainage and pH for Karl Rosenfield Peony
Karl Rosenfield Peony thrives in soil that stays moist but never waterlogged. Get the drainage and pH right at planting, and your peonies will flower reliably for decades. This guide walks you through assessing your soil, amending it if needed, and planting in conditions that support deep root development and consistent bloom.
Why Soil Quality Matters for Karl Rosenfield Peony
Karl Rosenfield Peony is a herbaceous perennial that lives in the same spot for 50 years or longer. Poor drainage is one of the fastest ways to kill a peony. Soggy soil kills the tuberous roots and invites fungal diseases like Botrytis blight, especially in cool, wet springs.
Soil pH affects nutrient availability and root health. Karl Rosenfield Peony prefers slightly acidic to neutral soil, which also protects against some soil-borne diseases. The right pH and texture work together to anchor deep roots and keep them fed.
Understanding Karl Rosenfield Peony's Soil Needs
Ideal Soil Type
Karl Rosenfield Peony performs best in fertile, well-drained loam. Loam is a balanced mix of sand, silt, and clay. If your soil is mostly clay or mostly sand, amending it is straightforward.
Drainage Requirements
The plant requires well-drained soil and does not tolerate soggy conditions. "Well-drained" means water drains within a few hours of rain or watering, and the soil does not stay waterlogged for days. In areas with heavy clay, raised beds or mounding can improve drainage.
Soil pH Range
The optimal range is 6.5 to 7.0, which is slightly acidic to neutral. Most garden loams fall within or close to this range. If your soil is very acidic (below 6.0) or alkaline (above 7.5), a simple pH test will confirm, and amendments can adjust it before planting.
Materials and Tools You'll Need
Before you start, gather these items:
- Soil test kit or pH meter (optional but recommended)
- Garden spade or shovel
- Compost or aged manure
- Peat moss or coconut coir
- Sand (if soil is heavy clay)
- Bone meal or low-nitrogen, phosphorus-rich fertilizer
- Garden fork or tiller
- Measuring tape and ruler
- Level (for checking grade)
Step-by-Step Soil Preparation
Step 1: Test Your Soil
Buy a simple home soil pH test kit from a garden center or contact your local extension service for a more detailed soil analysis. Knowing your starting pH saves guesswork and prevents over-amending. If you are in USDA zones 3 to 8 (Karl Rosenfield Peony's range), most soils fall into an acceptable range, but verification takes guesswork out of the process.
Step 2: Assess Drainage
Dig a hole about 12 inches deep in the planting area. Fill it with water and let it drain completely. Fill it again and time how fast it drains. If water drains within 2 to 4 hours, your drainage is good. If it takes longer than 12 hours, the soil is too dense and needs amendment or raised-bed planting.
Step 3: Break Up and Amend Compacted Soil
Use a garden fork or tiller to loosen the top 12 to 15 inches of soil in the planting area. Break up any hard-packed clay. Remove rocks and debris. Spread 2 to 3 inches of compost or aged manure over the loosened area and work it into the top 8 to 10 inches of soil. This improves both drainage and fertility.
Step 4: Adjust pH if Needed
If your soil pH is below 6.0, add ground limestone according to package directions, typically 5 to 10 pounds per 100 square feet. If pH is above 7.5, add sulfur at the rate recommended on the package. Mix amendments into the top 12 inches of soil. pH changes take a few weeks, so aim to adjust soil 4 to 6 weeks before planting.
Step 5: Improve Clay-Heavy Soil
If a drainage test showed very slow water movement, your soil is likely clay-dominant. Add 2 to 3 inches of sharp sand (not play sand) to the planting area along with compost. Work both amendments into the top 12 inches. This increases air space and allows water to drain without waterlogging the roots. Never use sand alone, which can compact and worsen drainage.
Step 6: Prepare the Planting Hole
Dig a hole about 18 to 24 inches wide and 12 inches deep. Mix the removed soil with compost in a 2:1 ratio (2 parts soil, 1 part compost). Add a handful of bone meal or a low-nitrogen, phosphorus-rich fertilizer to the mix. This feeds the developing roots without promoting excessive leafy growth at the expense of blooms.
Step 7: Plant at the Right Depth
This step is critical. Karl Rosenfield Peony must be planted so the eyes (the small buds on the tuberous root crown) are no more than 1 to 2 inches below the soil surface. Planting too deep is one of the most common reasons peonies fail to bloom. Set the crown in the hole and backfill with your amended soil mix. Firm the soil gently around the crown without compacting.
Step 8: Water and Settle
Water the planting area thoroughly to settle the soil and eliminate air pockets. The soil should feel moist but not soggy. Water again a few days later if rainfall is scarce.
Step 9: Space Multiple Plants Correctly
Karl Rosenfield Peony grows to 28 to 36 inches tall and 24 to 36 inches wide at maturity. Space plants 3 to 4 feet apart to allow for air circulation and reduce disease risk. Good spacing also makes it easier to harvest cut flowers without crowding the plants.
Tips and Common Mistakes to Avoid
Planting Depth
The most common mistake is burying the crown too deep. Even if the peony survives, it may not flower for years. Measure carefully: the eyes should sit 1 to 2 inches below the final soil level, no deeper.
Soggy Soil vs. Dry Soil
Karl Rosenfield Peony needs about 1 inch of water per week during active growth, but not all at once and not from standing water. Drip irrigation or soaker hoses deliver water steadily without saturation. Avoid mulch piled against the crown, which traps moisture and invites rot.
Don't Over-Fertilize
Excess nitrogen pushes leafy growth and delays flowering. Use a balanced or phosphorus-rich fertilizer in early spring as shoots emerge, and stop by summer. Bone meal worked into the planting hole provides phosphorus for years without excess nitrogen.
Salt Tolerance
Karl Rosenfield Peony has low salt tolerance. Do not plant near roads treated heavily with salt, and avoid fertilizers with high salt indexes if you garden in an arid climate. Rinse salt buildup from the surface with fresh water in spring.
Best Planting Season
Bare-root peony divisions establish fastest when planted in fall. Fall planting gives roots time to develop over winter before spring growth demands. Container-grown plants can go in spring, but they may take an extra year to reach full flowering potential.
Botrytis Blight Prevention
Good drainage and air space between plants are your best defenses against Botrytis blight. After years of growth, if foliage becomes crowded or dense, thin stems in early spring to improve air flow. Remove all fallen foliage in late fall.
Expected Results and Timeline
Karl Rosenfield Peony may produce light blooms in its first year after planting, but typically takes 2 to 3 years to reach full flowering potential. This is normal and not a sign of failure. The plant is investing energy in root development and establishing itself.
Once established, a properly sited Karl Rosenfield Peony will flower reliably each late spring to early summer (May to June, depending on your USDA zone) for decades without division or heavy maintenance.
For detailed care through the rest of the season, see our full care guide. If your peony is not blooming even after 3 years, visit our troubleshooting article on why peonies fail to bloom for other factors to check.
Quick Reference: Soil and Drainage Checklist
| Element | Requirement | How to Check |
|---|---|---|
| Soil Type | Fertile, well-drained loam | Should feel crumbly, not sticky or dusty |
| Soil pH | 6.5 to 7.0 (slightly acidic to neutral) | Use a home pH test kit or extension soil test |
| Drainage | Water drains within 2 to 4 hours | Dig a 12-inch hole, fill with water, time it |
| Compost Amendment | 2 to 3 inches worked into top 8 to 10 inches | Mix in before planting, not piled on surface |
| Crown Depth | Eyes 1 to 2 inches below soil surface | Measure from eye level to finished soil grade |
| Spacing | 3 to 4 feet between plants | Use a measuring tape |
| Water During Growth | About 1 inch per week (consistent, not heavy) | Use drip irrigation or soaker hose, not overhead |
| Mulch (if used) | Do not pile against crown | Keep a 2 to 3-inch gap around the base |